Order Entry
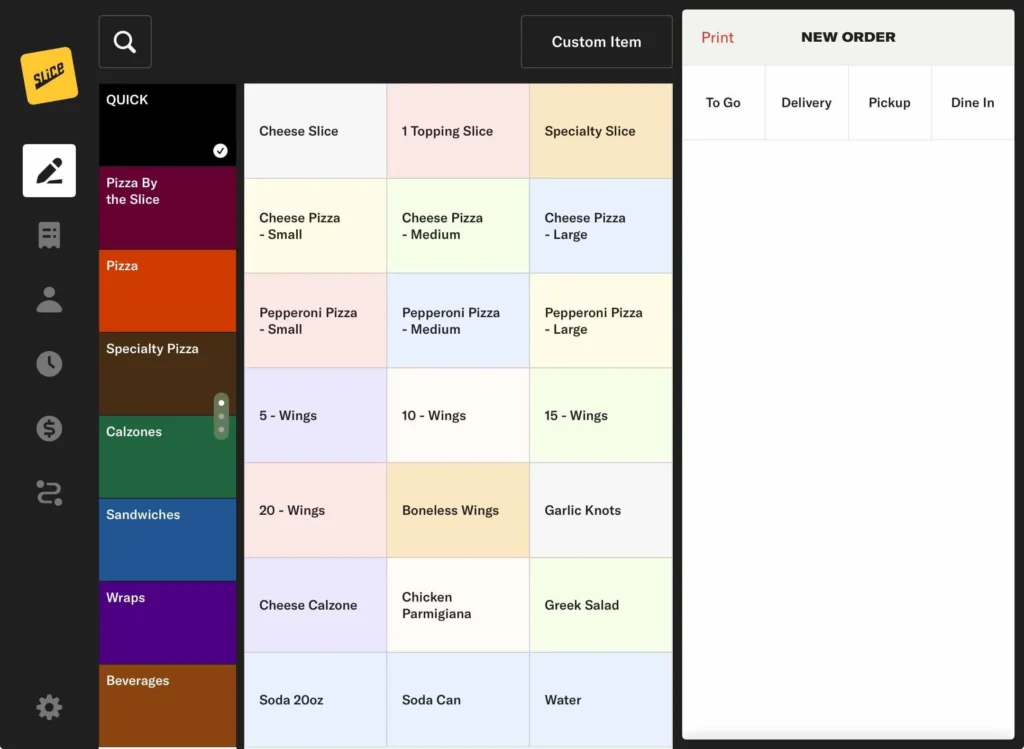
Order Entry is where you can create walk-in and phone orders. This will function as your home screen so you are always ready for the next order. Here’s a breakdown of the layout from left to right:
Navigation Bar
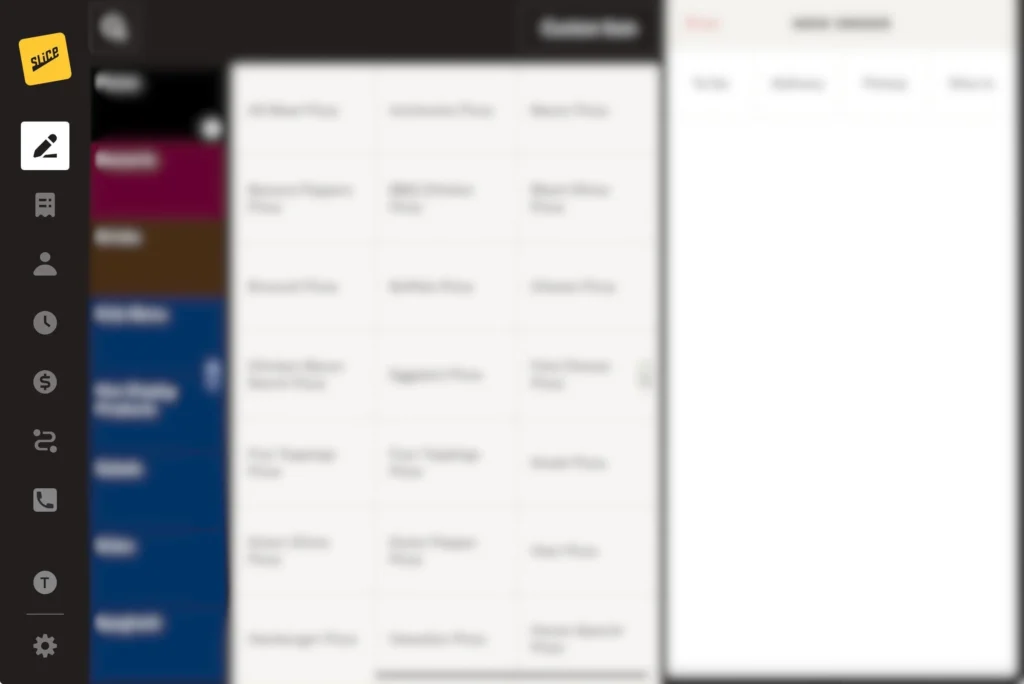
The leftmost column is the navigation bar, where you can switch between different screens of the Register, including Order Management, Customers, Settings, and more. The top icon (a pencil writing an order) is the Order Entry button, where you can start new orders.
Menu Categories
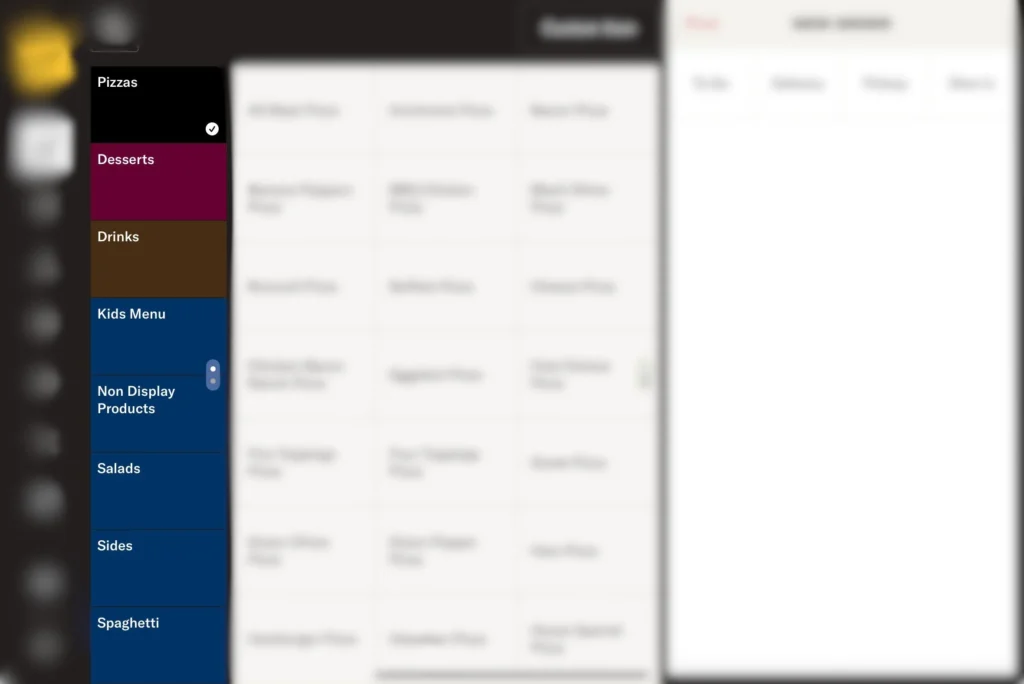
The next column contains categories from your menu. You can scroll up and down by sliding your finger. Tap a category to view the items in that section.
You can edit your menu categories in the Owner’s App (web) by renaming, rearranging, and assigning colors to match your shop’s workflow.
Items
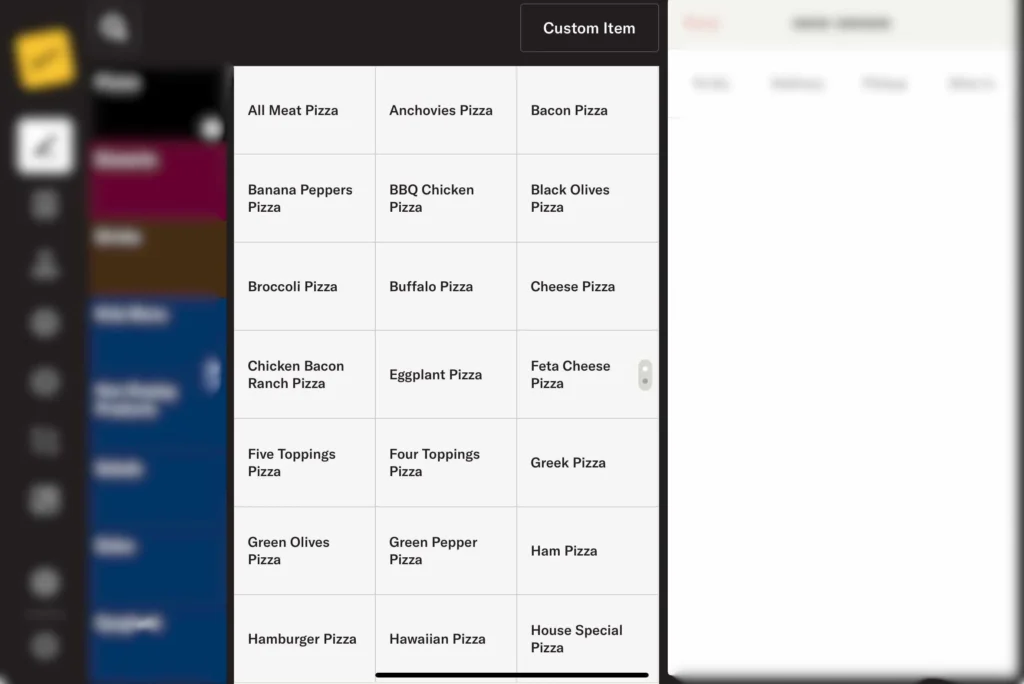
Once you select a category, items from that category appear in the middle of the screen.
You can customize your menu items in the Owner’s App (web) by renaming them, changing their order, and assigning colors.
Dining Options
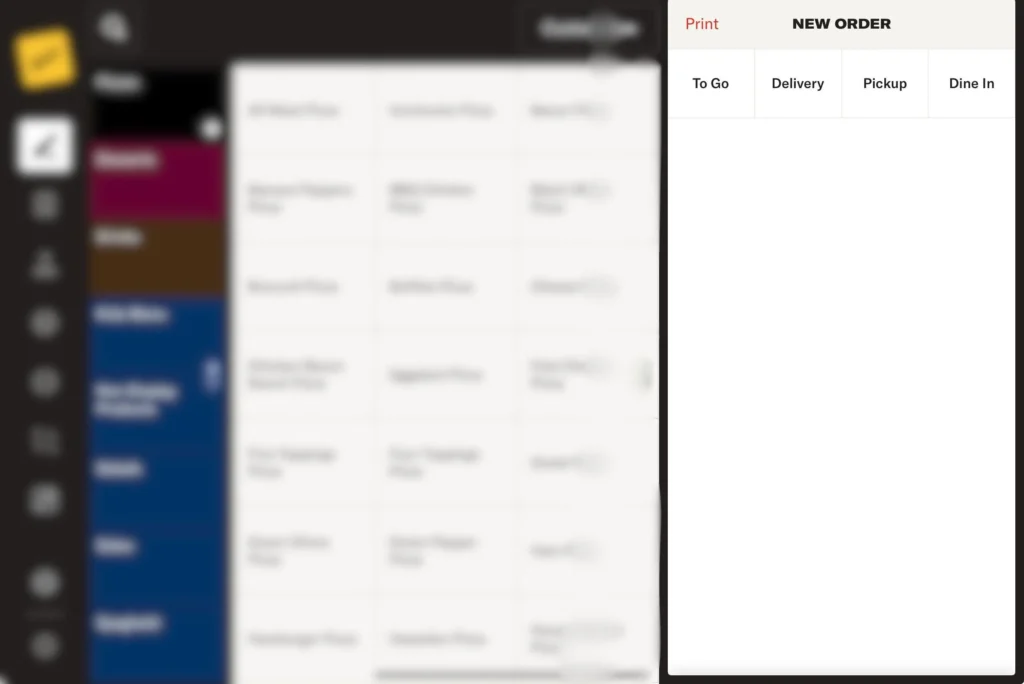
On the far right are the dining options. We recommend always selecting the dining option first when starting a new order.
- Dine In – Orders placed in-store and consumed in-store.
- Pickup – Orders placed over the phone that require a name and phone number.
- Delivery – Orders traditionally placed over the phone that require a name, phone number, and address.
- To Go – Orders placed in-store but packaged to be consumed away from the shop. These do not require customer information.
Starting a New Order
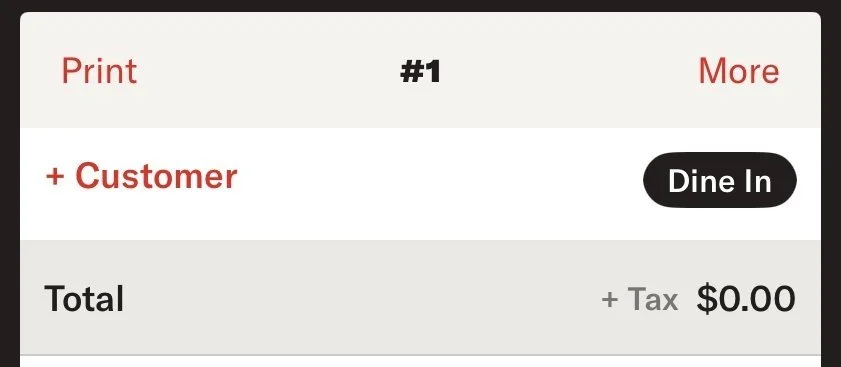
Select the Dining Option – Tap Dine In.
- A Dine In label will appear in the top right. If you picked the wrong dining option, tap the dining option pill to change to the correct dining option.
- Dine-in orders do not require customer information, but you can add a customer by tapping +Customer.
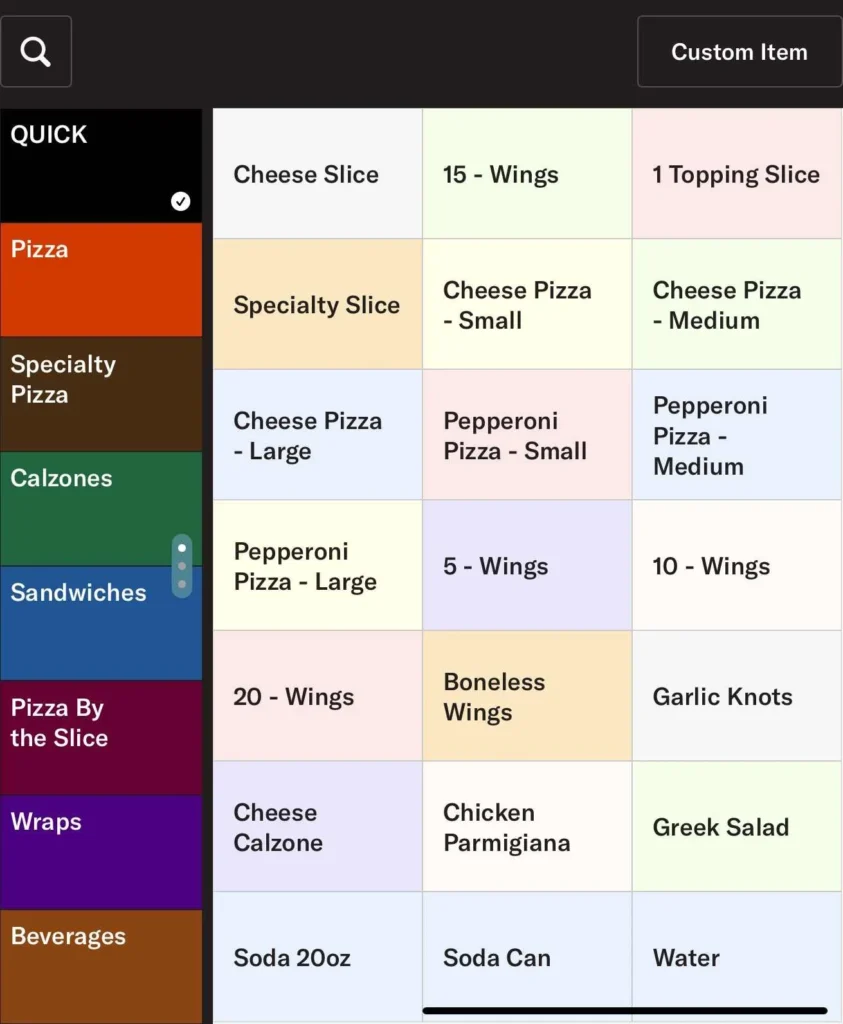
Select a Category – Tap the category of the item you want to add.
Choose an Item – Tap an item from the category list.
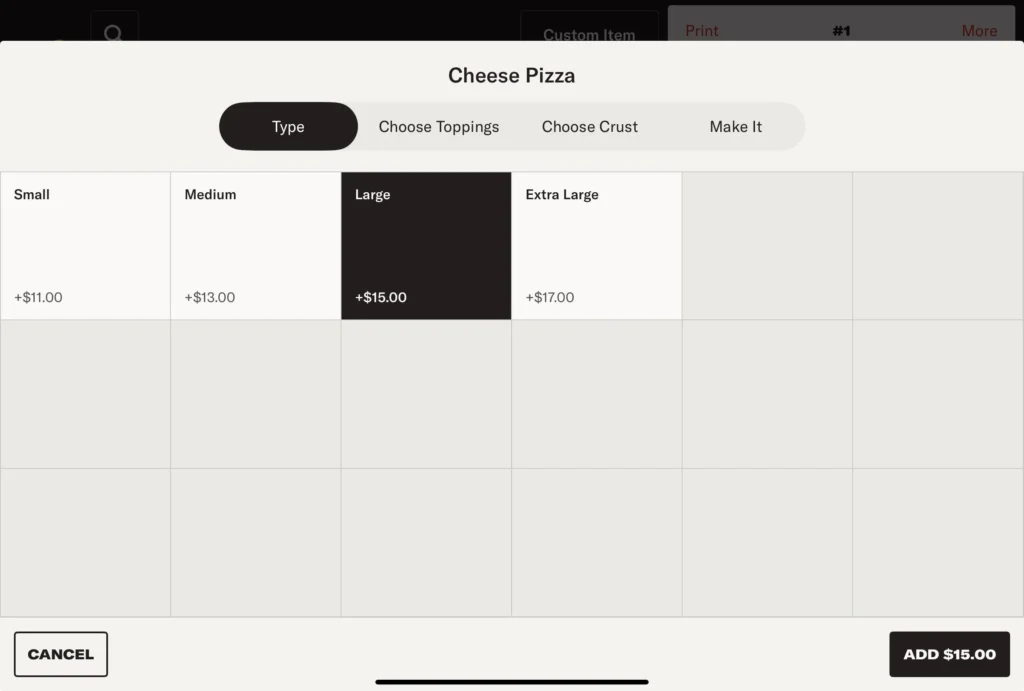
Select the Item Type – Choose a size, style, quantity, etc. (For pizzerias, this is usually size.)
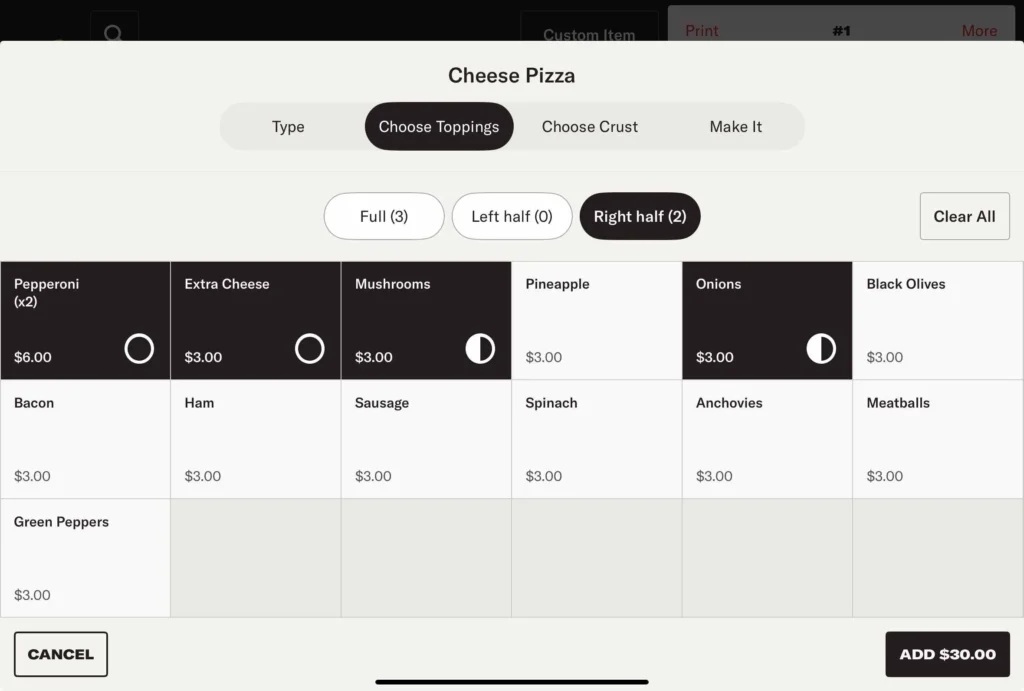
Add Modifiers:
- Tap an add-on once to add it.
- Tap twice to double the topping.
- Tap a third time to remove the topping.
- For pizzas, use Choose Toppings to select half toppings.
- First, tap the half where you want to add toppings.
- Then, select the topping.
Add the Item – Tap the Add button in the bottom right.
Editing Items After Adding Them
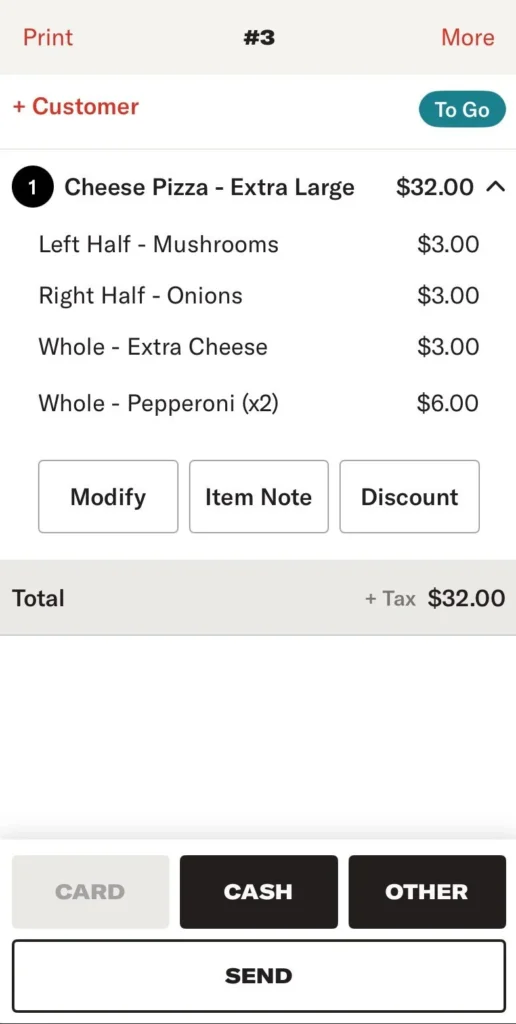
Once an item is added, it appears in the check on the right side of the screen.
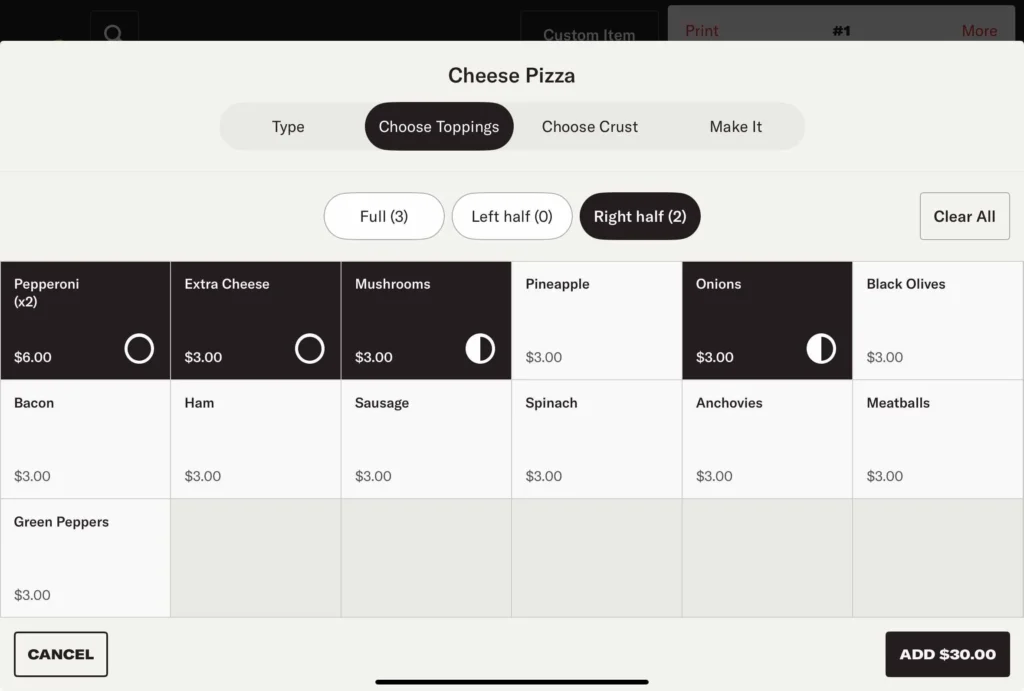
Modify – Tap Modify to return to item options and make changes.
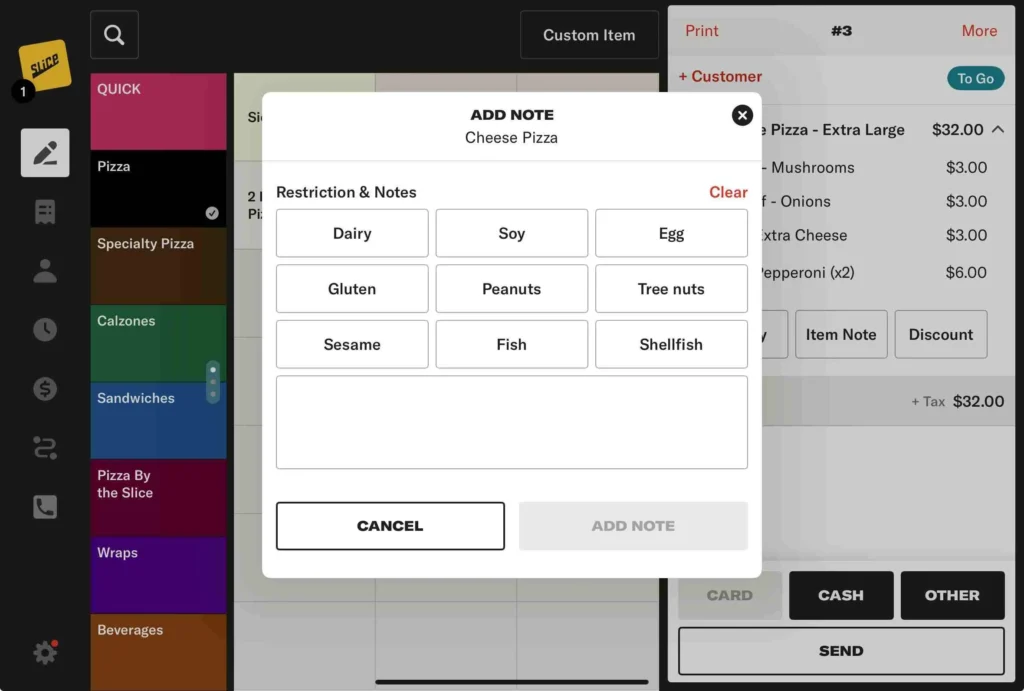
Item Notes – Use this to enter special requests, allergies, or custom add-ons. This is item specific
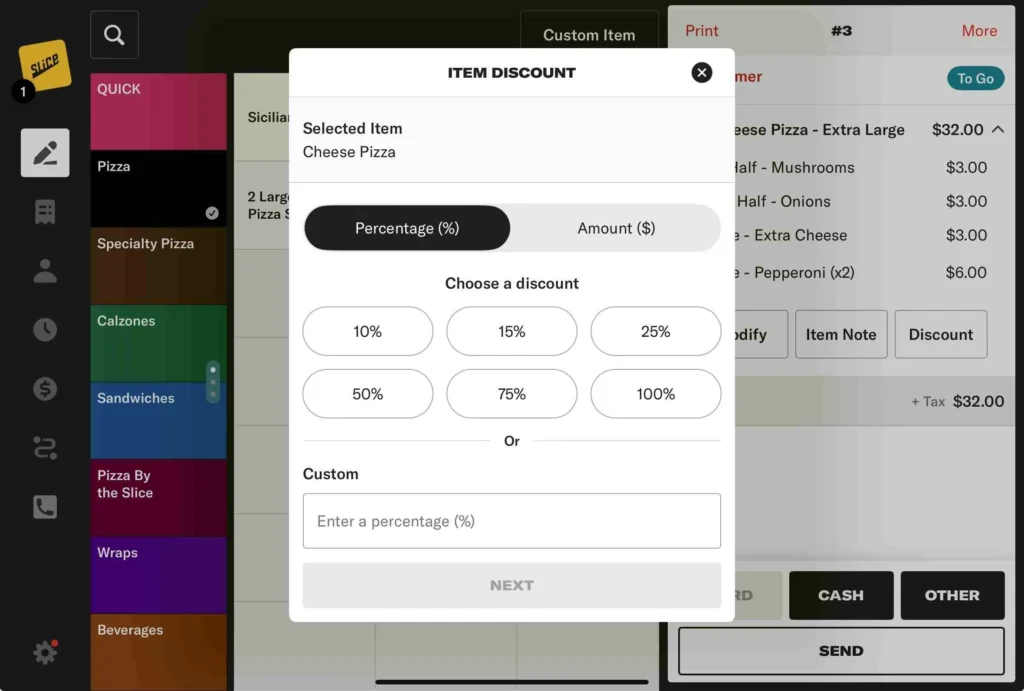
Line Item Discount – Tap Discount to apply a discount to an item. Choose between Percentage or Amount ($). Select from one of our preassigned values or enter a custom discount value.
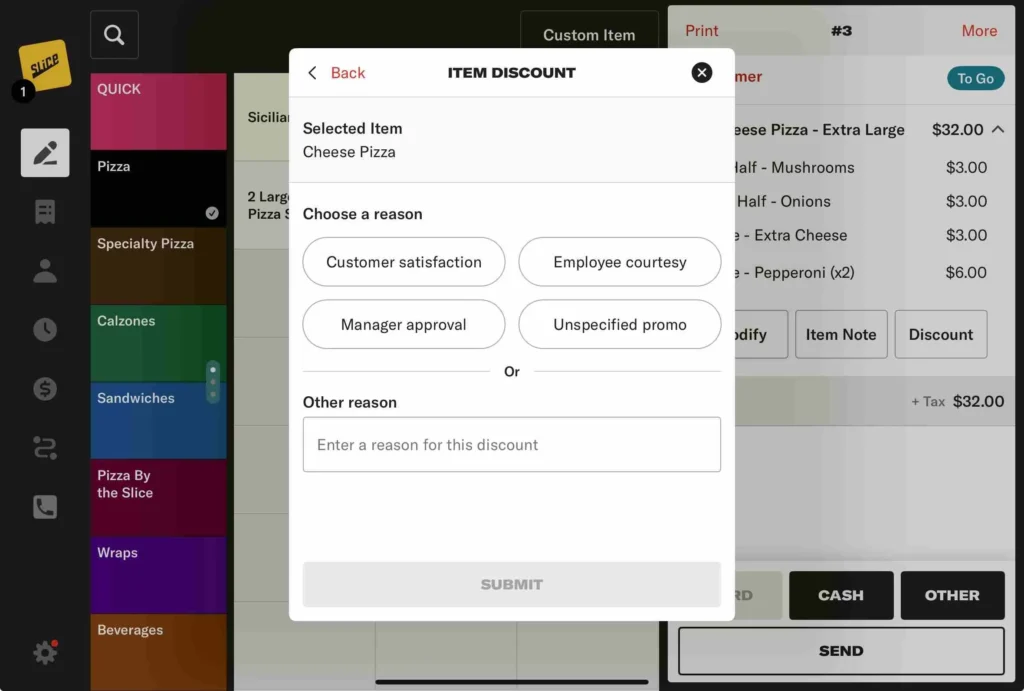
Discount (continued) – Choose a reason or enter an Other reason.
Line Item Discounts are enabled on the Owner’s App (web) under Register > Promotions & Discounts > Line Item Discounts. You can control who can attach a line item discount in the Employee Permissions Section of the Owner’s App (web).
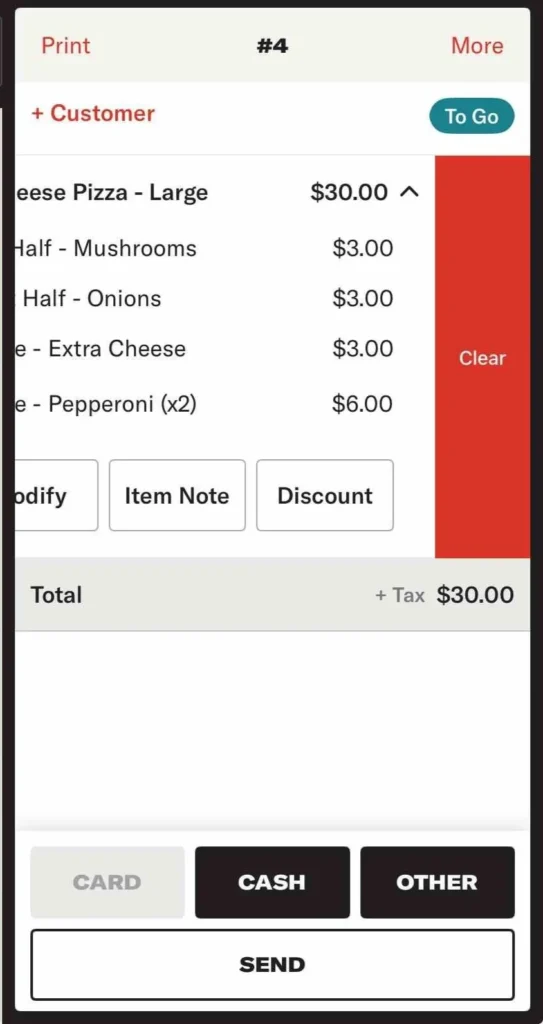
Remove an Item – Slide left on an item in the check and tap Clear.
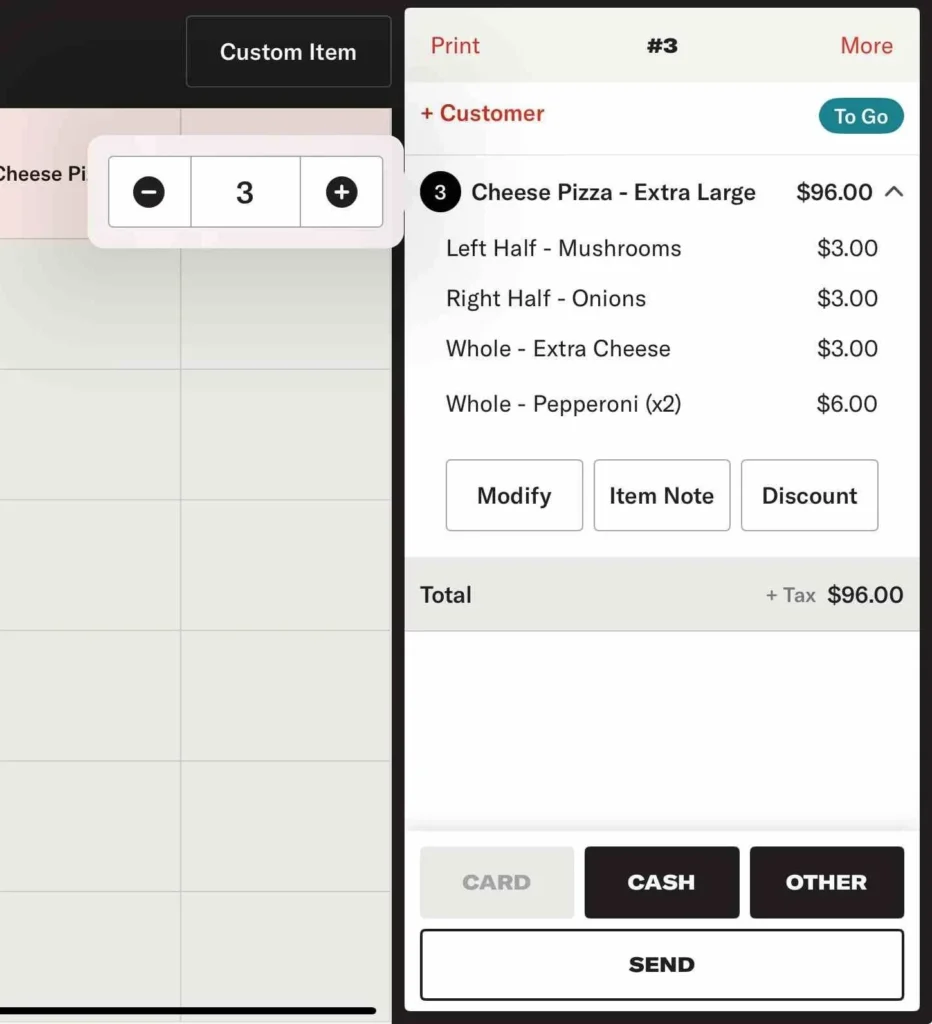
Adjust Quantity:
- Tap the black circle with the number next to the item.
- Use the + or – to adjust the quantity.
- Tap the number to manually enter a quantity.
Adding a Custom Item
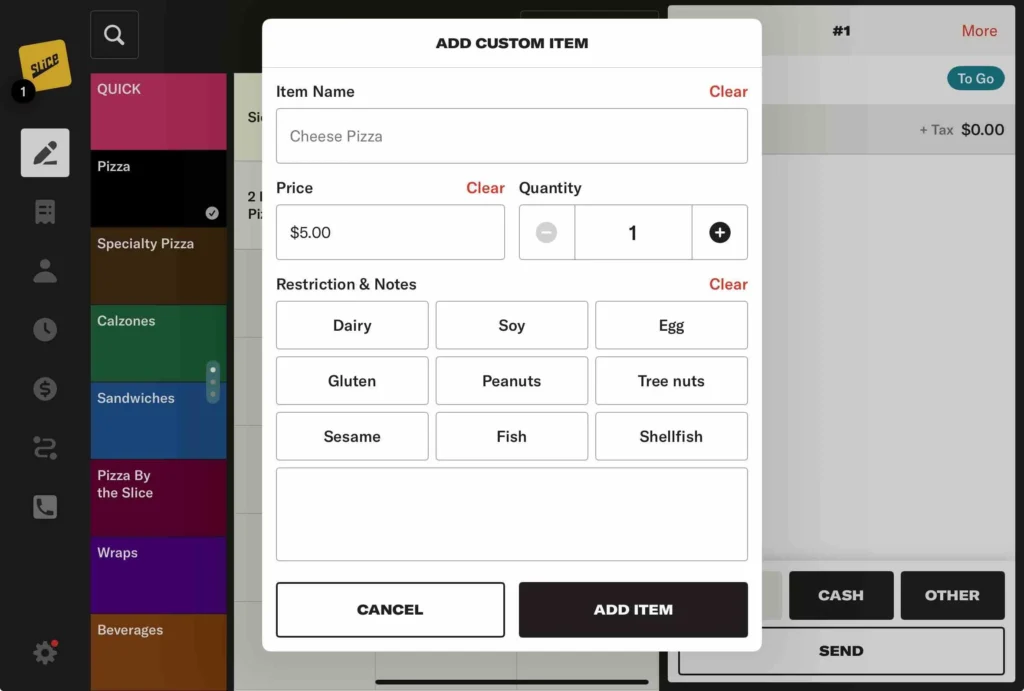
If an item is not on your menu:
- Tap Custom Item (above your menu items).
- Enter a price.
- (Optional) Add a name for the custom item.
Search for an Item
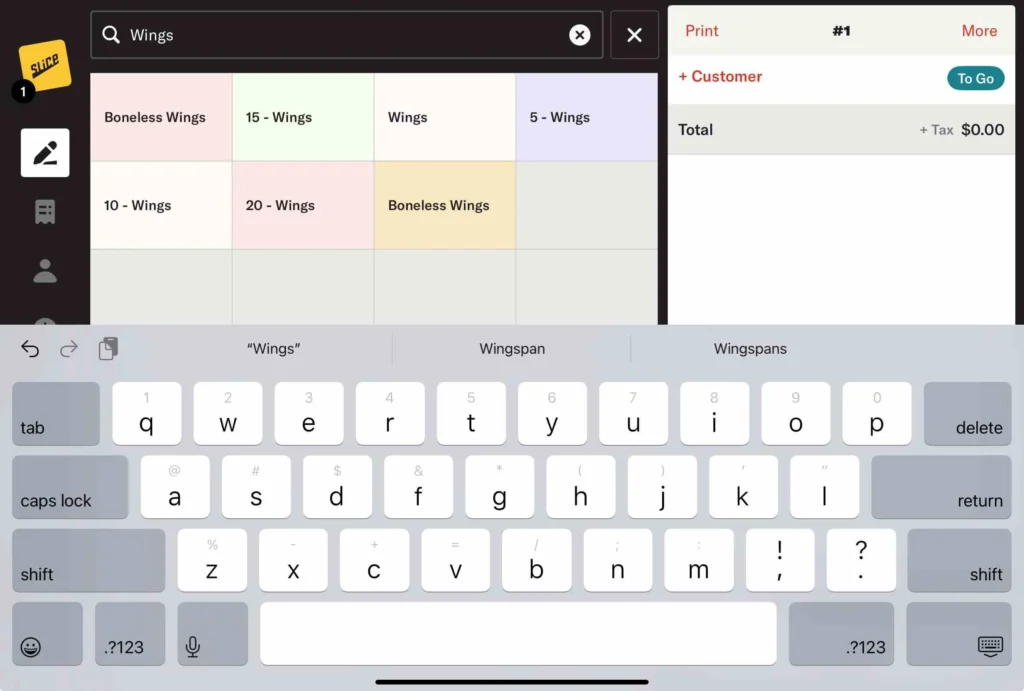
Above the category list is a Search Icon. Tap this to type in an item name and quickly find it without guessing the category.
More Order Actions
Tap More to access additional order tools:
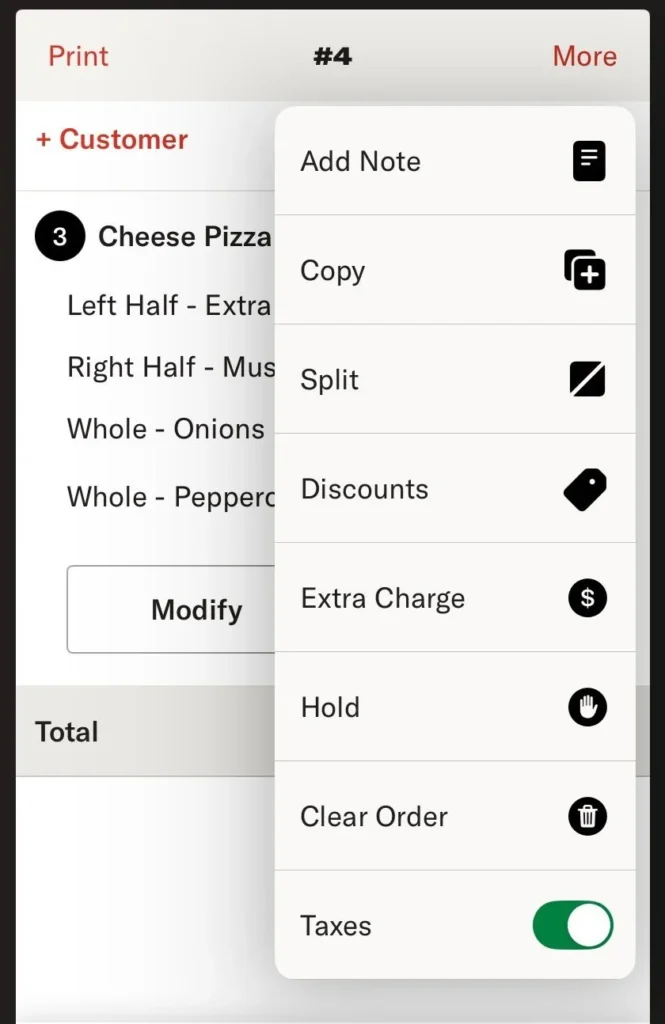
Add Note – Attach a note to the entire order (e.g., special instructions).
Copy – Duplicates an order, useful after payment.
Split – Allows splitting checks.
Discounts – Shows available discounts:
- Fixed Dollar Amount
- Fixed Percentage
- Variable Discount (enter a custom value)
- Tap the icon in the top left to switch between percentage and dollar amount.
Extra Charge – Adds a charge. We recommend using it for custom add-ons, but it is not limited to that and can be used for any additional charges.
Hold – Saves the order in Order Management > In Progress. The order will not print to the kitchen until it is paid for or sent. This order will have a blue notification.
Clear Order – Removes all items from the check.
Taxes – Toggles sales tax on/off for the entire order.
The ability to use Discounts, Clear Orders, Split Orders, Copy Orders, Disable Taxes, etc., can be restricted through Employee Permissions. These settings can be managed through the Owner’s App (web). If Employee Permissions are not enabled, all users can access these tools.
Paying for an Order
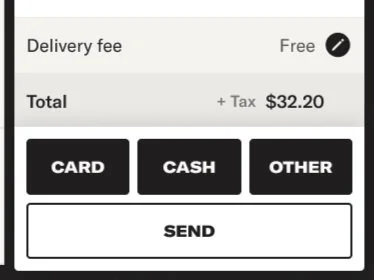
There are three ways to pay for an order: Card, Cash, and Other.
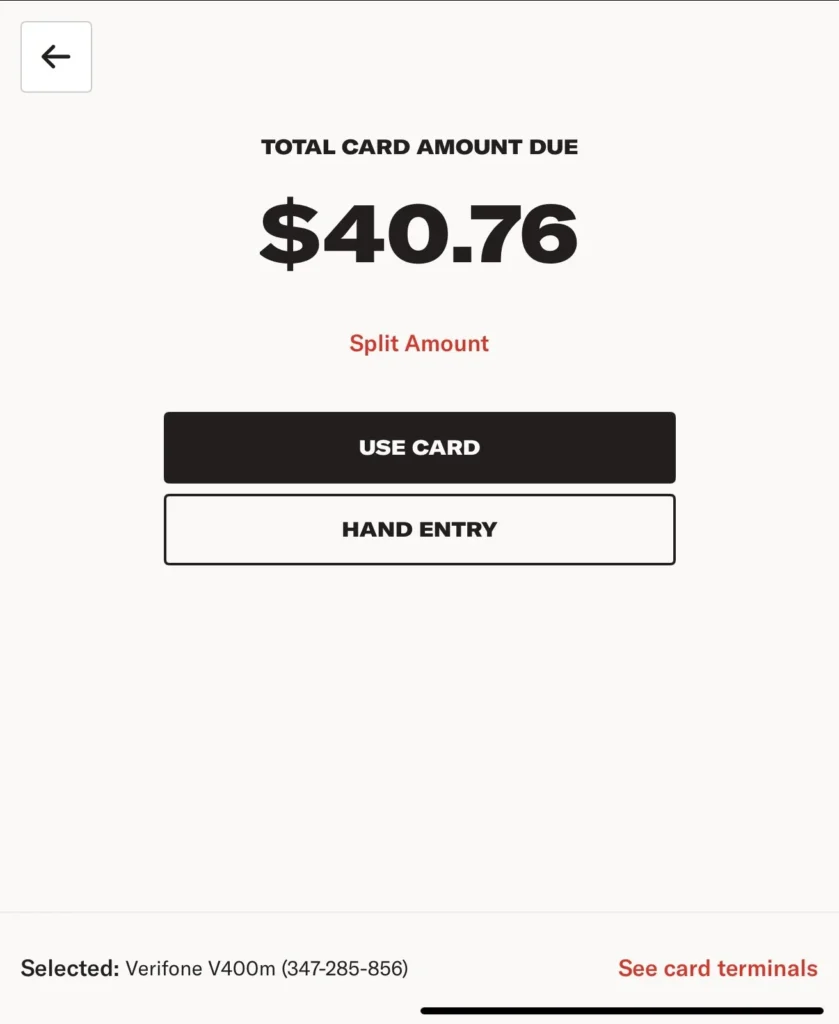
Card – Takes you to the card payment screen and sends the order after applying payment.
- Tap Card
- Choose Use Card if the customer is in front of you with a physical or virtual card like Apple Pay or Google Pay. If the customer pays over the phone, select Hand Entry to manually type the number into the reader.
- On the card reader, the customer will be prompted to add a tip and use their card.
- Tap Print Receipt Copy for an additional customer receipt, or Done to return to the Menu screen.
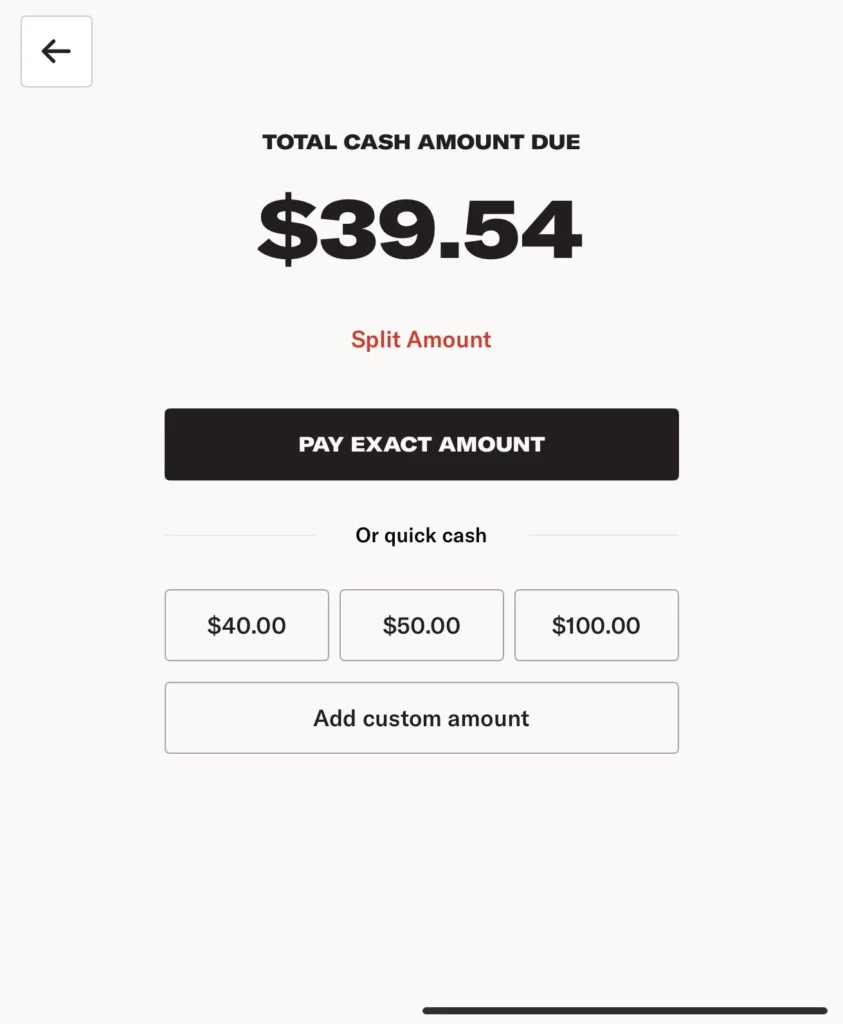
Cash – Takes you to the cash payment screen and sends the order after payment has been applied.
- Tap Cash
- Choose the best quick cash option. Pay Exact Amount for no change. Select Add custom amount for specific dollar amounts.
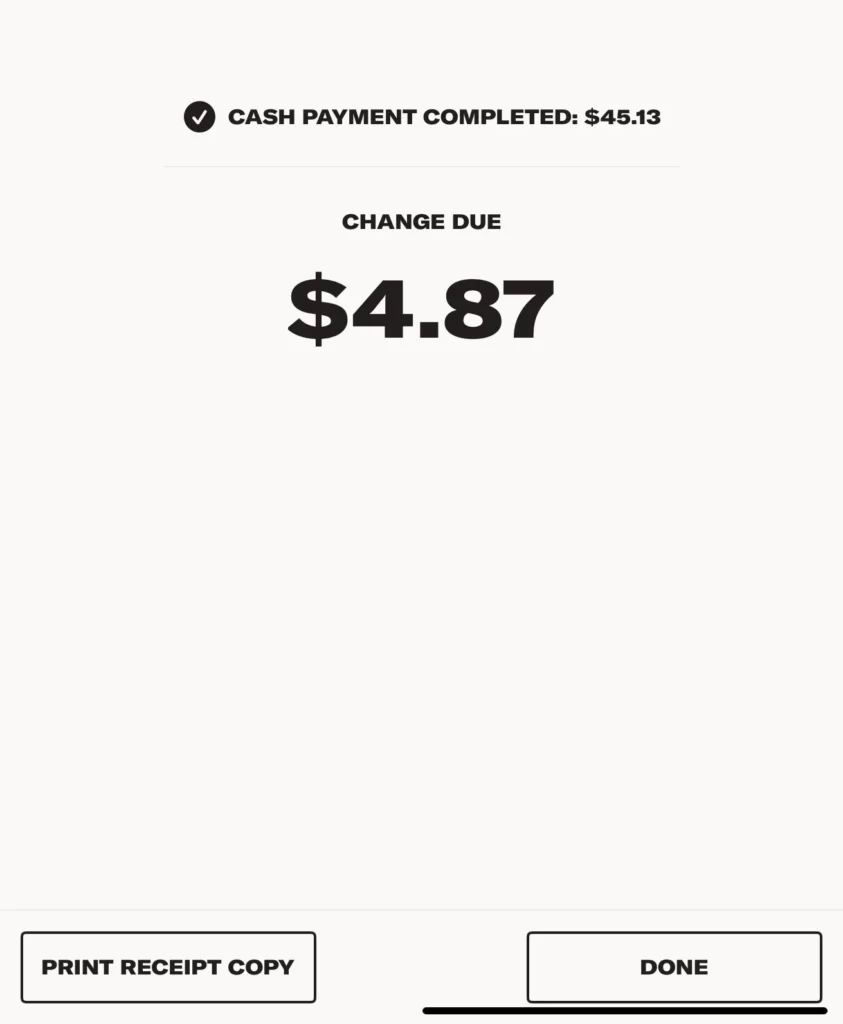
- Tap Print Receipt Copy for an additional customer receipt, or Done to return to the Menu screen.
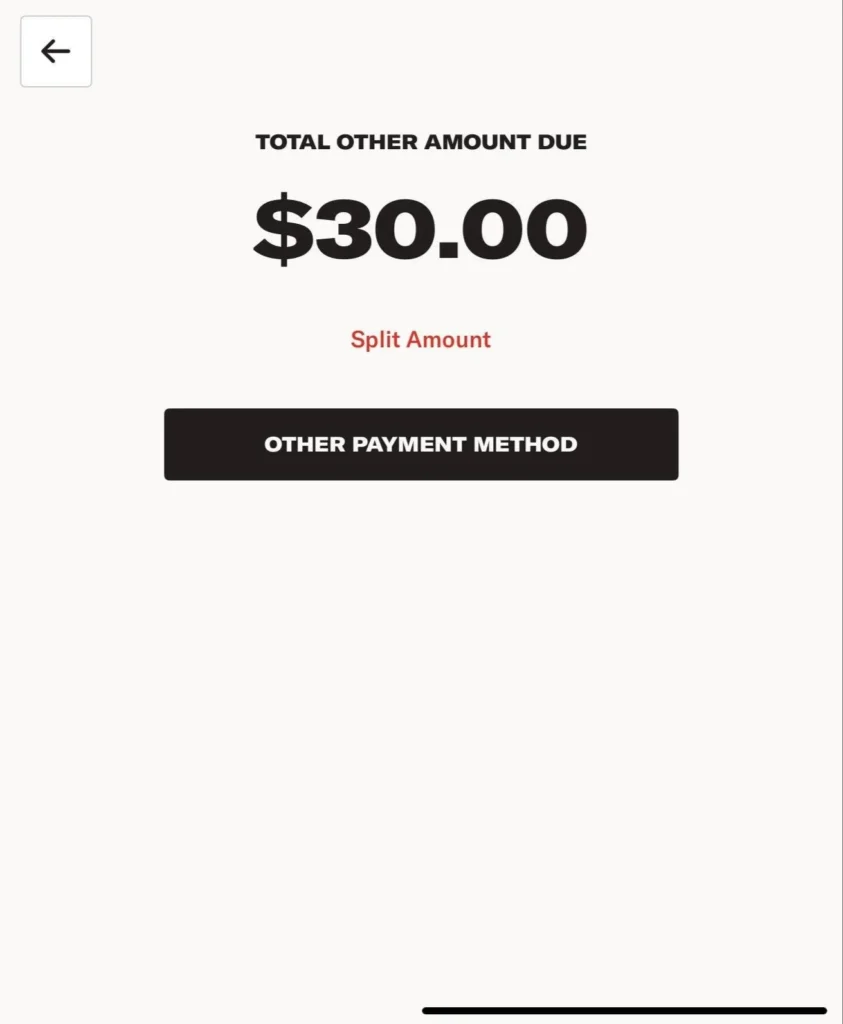
Other – Takes you to the other payment screen and sends the order after payment has been applied. Used for anything that is not cash or card, e.g., check, paper gift certificate, running your own invoices, etc.
- Tap Other
- Tap Other Payment Method
- Tap Print Receipt Copy for an additional customer receipt, or Done to return to the Menu screen.
Customer Facing Display
The customer-facing display appears on the Register iPad and is shown by flipping or tilting the iPad to face the customer during checkout. It displays the entire order and total price, allowing the customer to confirm that everything is correct before making a payment.
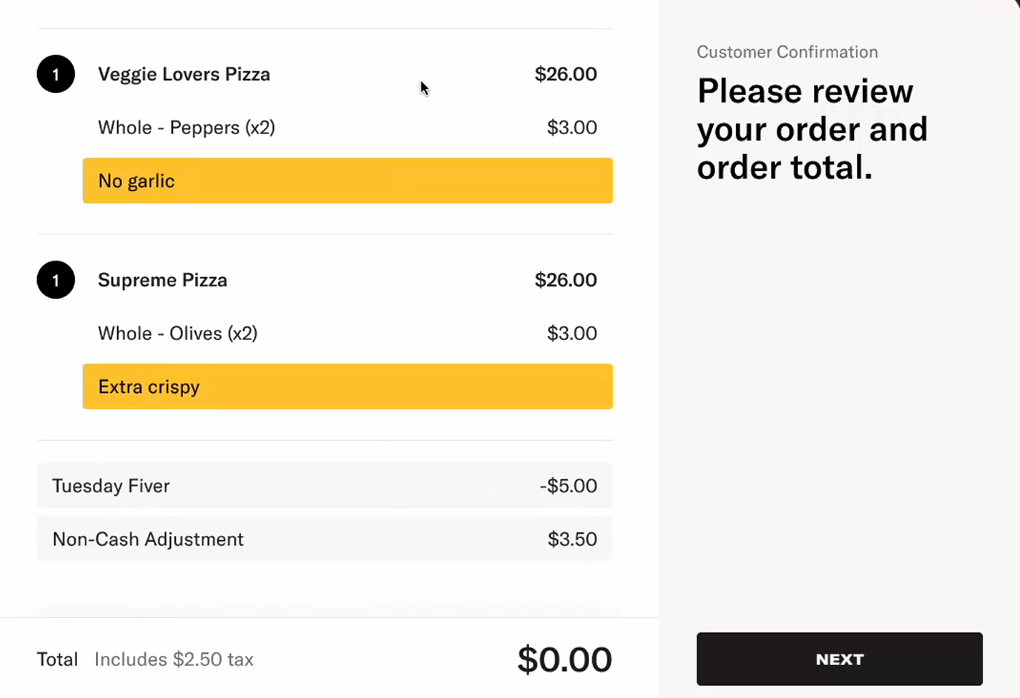
When enabled, the customer-facing screen appears automatically after the cashier taps any payment type — Card, Cash, or Other. Once the customer has reviewed their order, they tap Next to confirm the order. A short sound will play, and after a 2-second delay, the iPad will return to the shop-facing payment screen. Credit card payments and tipping are still completed through the shop’s credit card reader.
The customer-facing display is optional but may be required in some states.
To enable or disable the customer-facing display, go to the Settings section of the Owner’s App (web). After making the change, you must tap Download Changes from Slice on your Register iPad for the update to take effect.
Splitting a Payment
The Split Payment option lets you accept more than one form of payment for a single order. You can divide the payment evenly, assign custom amounts, or apply a full payment to part of the order.
Tap Card, Cash, or Other to begin the payment process.
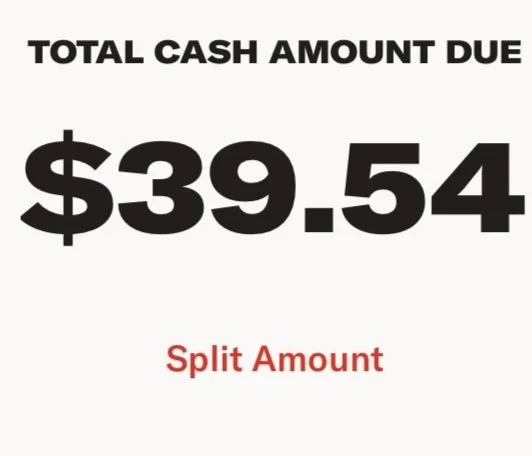
Tap the red Split Amount button under Amount Due.
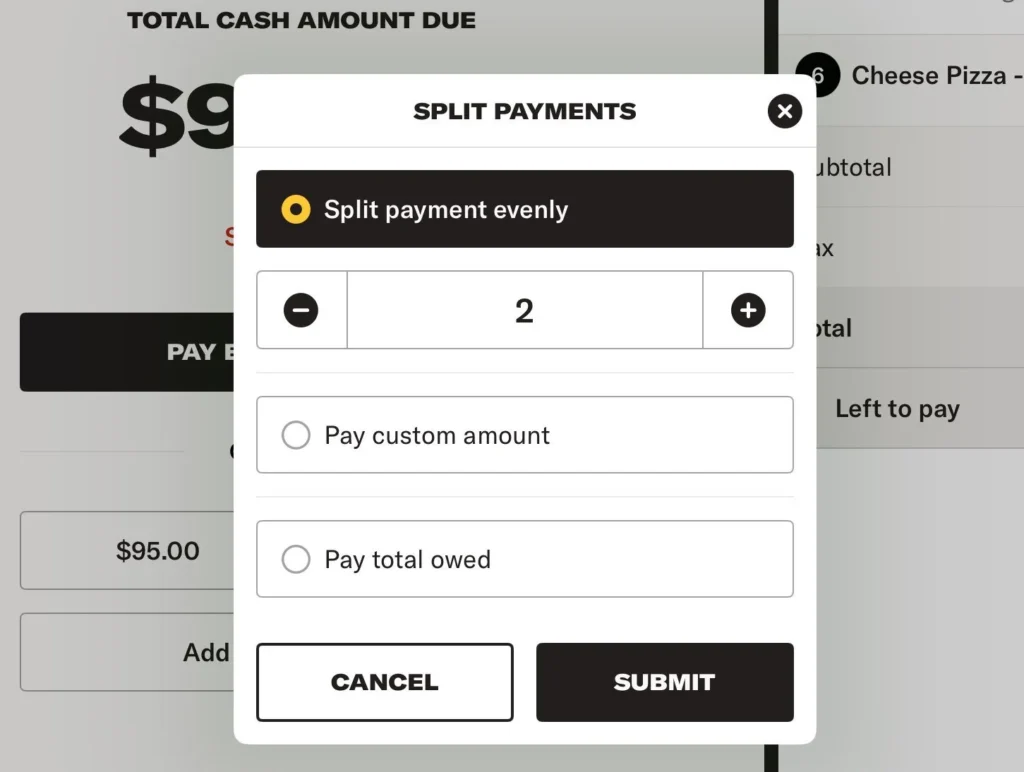
- Split payment evenly: Divide the amount into equal parts.
- Pay custom amount: Enter how much the customer wants to pay.
- Pay total owed: Apply the full amount to the payment method.
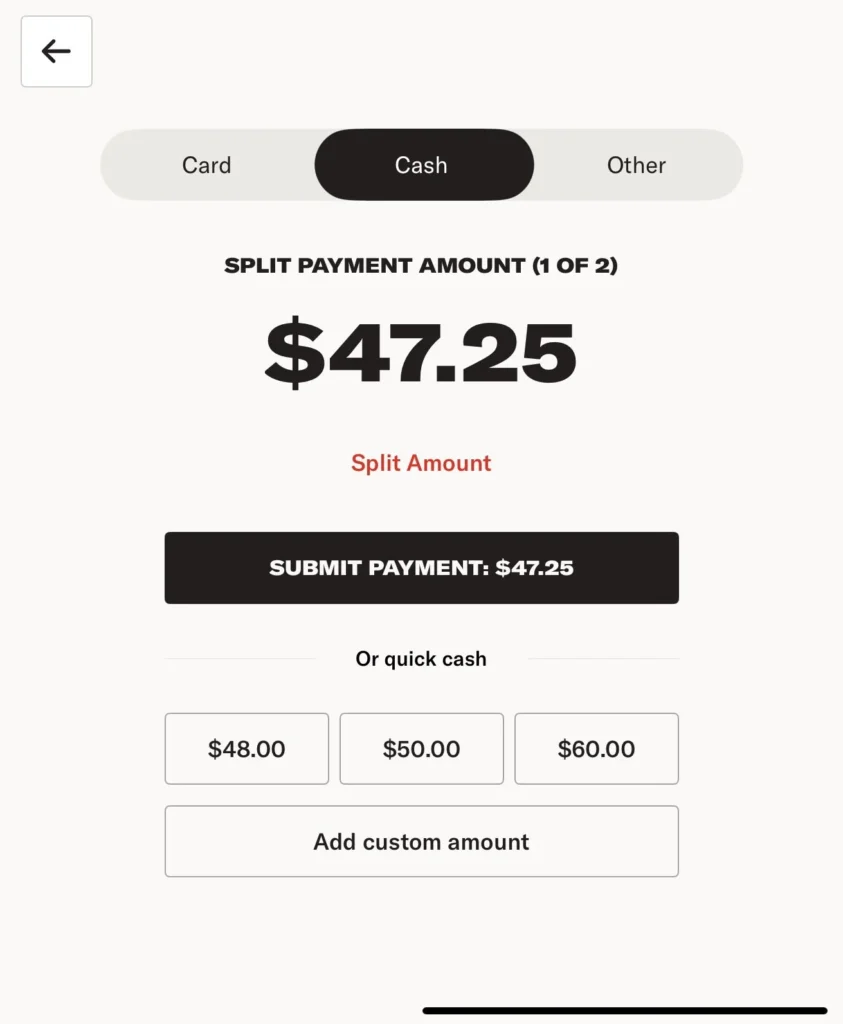
Select the payment type for the first payment and complete the payment.
After the first payment is complete, choose whether to:
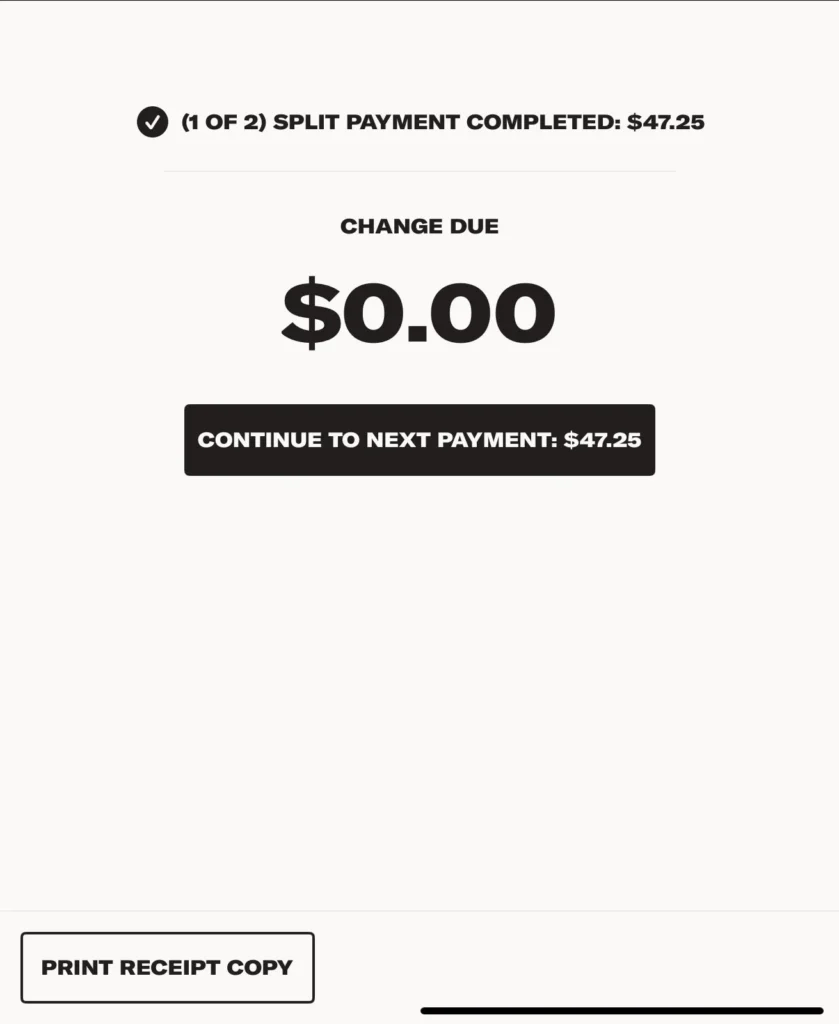
- Print a customer receipt, or
- Continue to the next payment.
Repeat the process until the full amount is paid. You can split the remainder as well.
Sending an Order

Send – Sends the order to the kitchen and starts a new order. The order is now on the Order Management – In Progress screen, waiting to be paid. This is most commonly used for Pickup orders or if your shop has dine-in customers who pay after they receive their food.
Orders are not complete until they are paid. Use Order Management to track unpaid orders.
Starting a Pick Up, Delivery, or To Go Order
Pick Up Orders
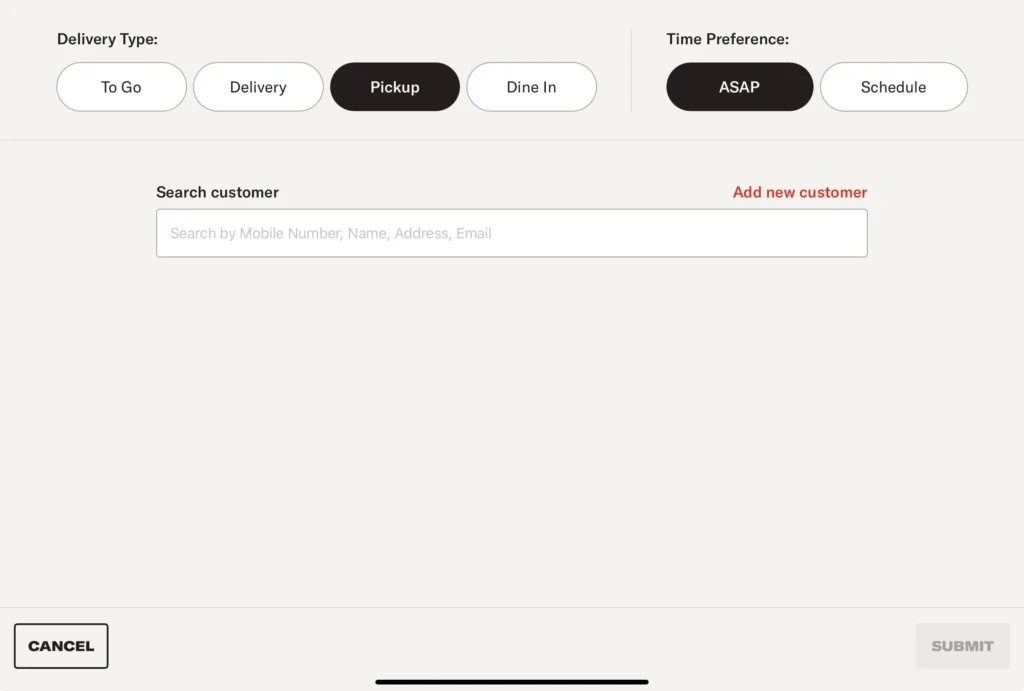
First tap Pick Up. You will be brought to the Customer screen.
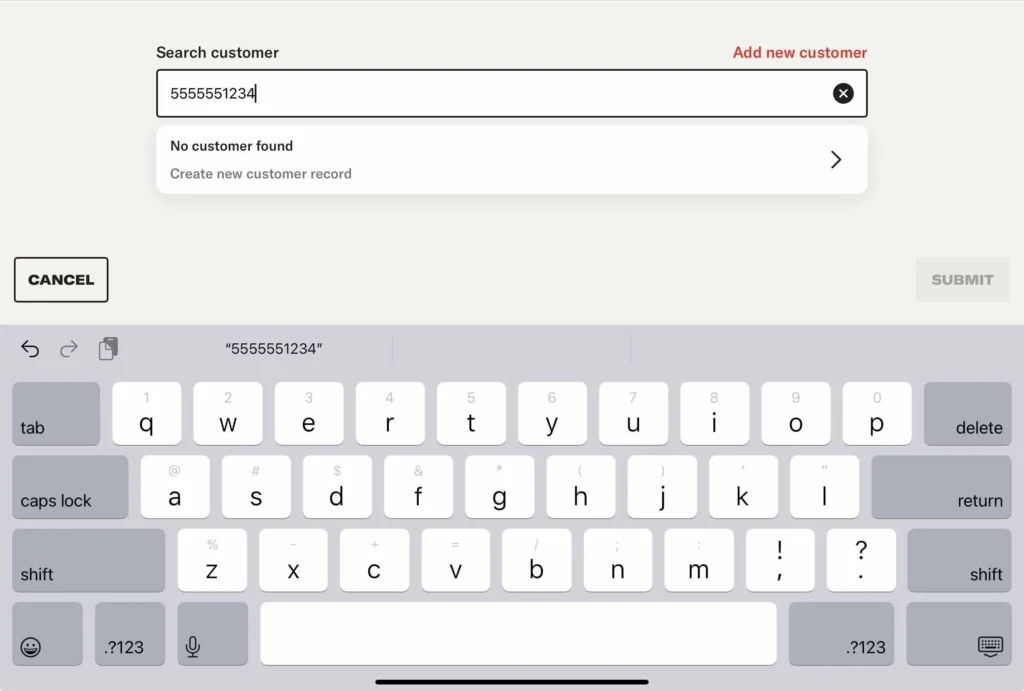
Search for the customer using their phone number. You can also search by name, address, or email, but phone number is the most unique identifier.
All Slice Online customers are already in the Slice database. You can import older POS customer lists in the Owner’s App (web).
If the customer does not have a profile, tap Add New Customer.
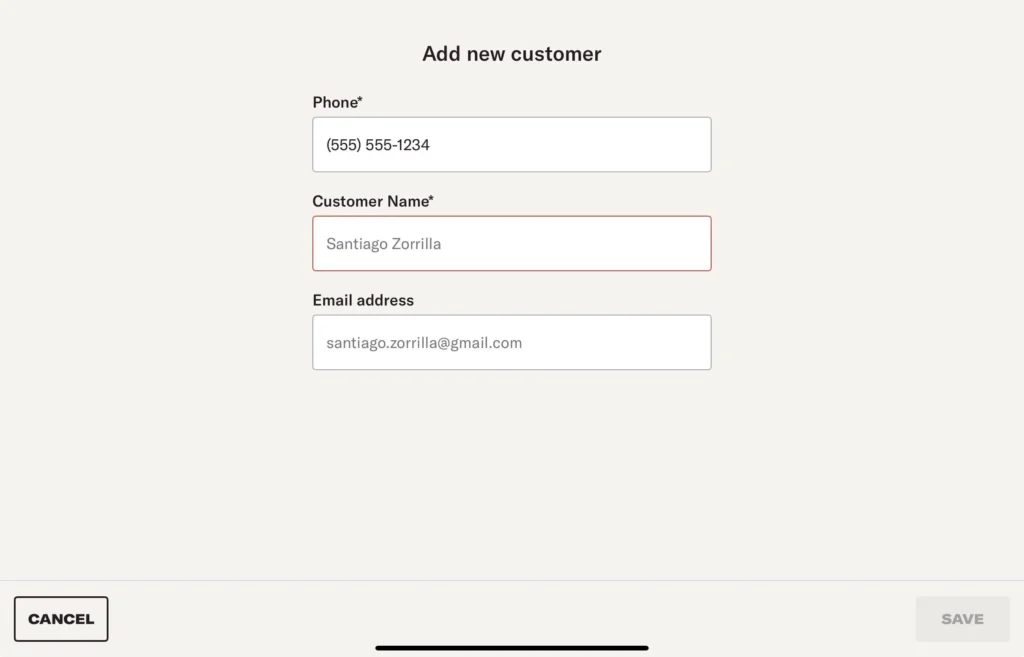
Any information entered in the search will carry over to the new customer page, so we recommend typing the full number first.
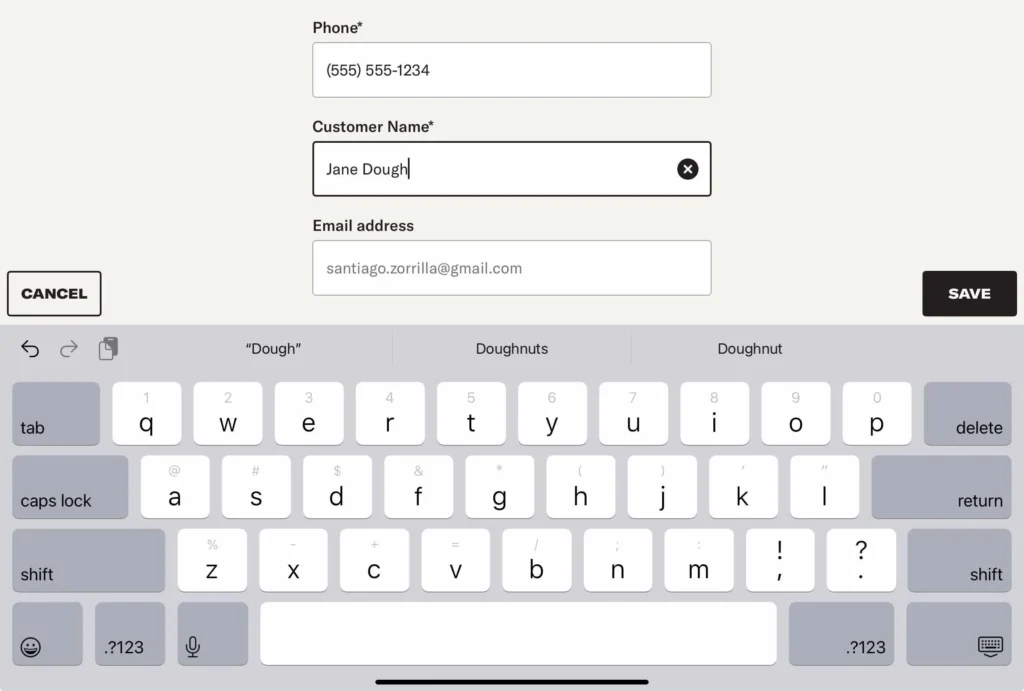
Pick Up orders require phone number and name. Email is optional.
Tap Save.
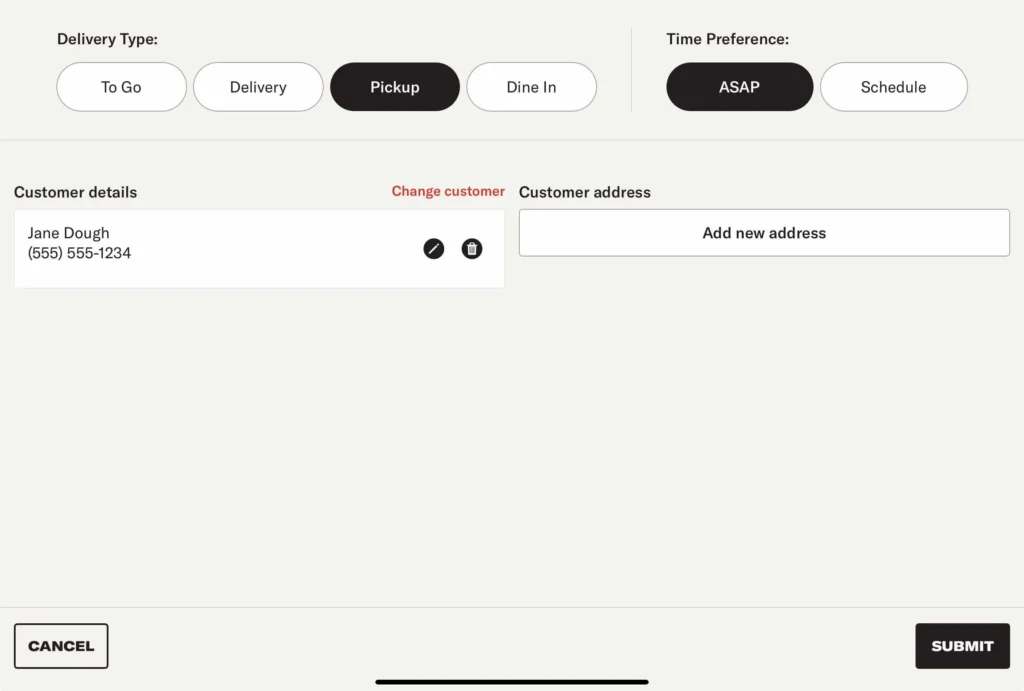
Tap Submit to start the order.
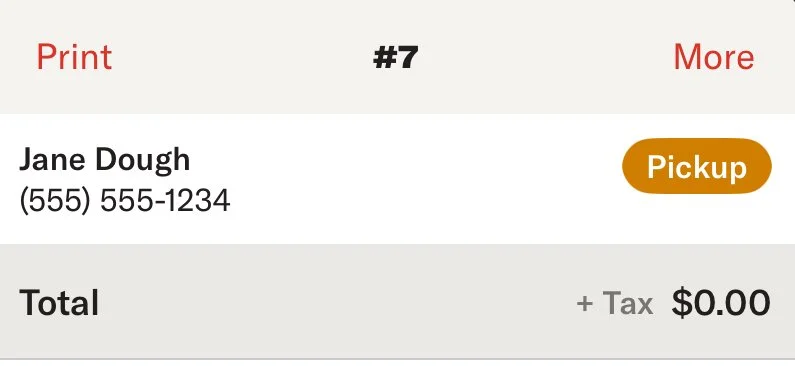
Continue with the order and enter the items.
If the customer is paying over the phone, tap Card and proceed with Hand Entry.
If the customer is paying when they arrive, tap Send. The order will be in the Order Management – In Progress section when the customer arrives to pay.
Delivery Orders
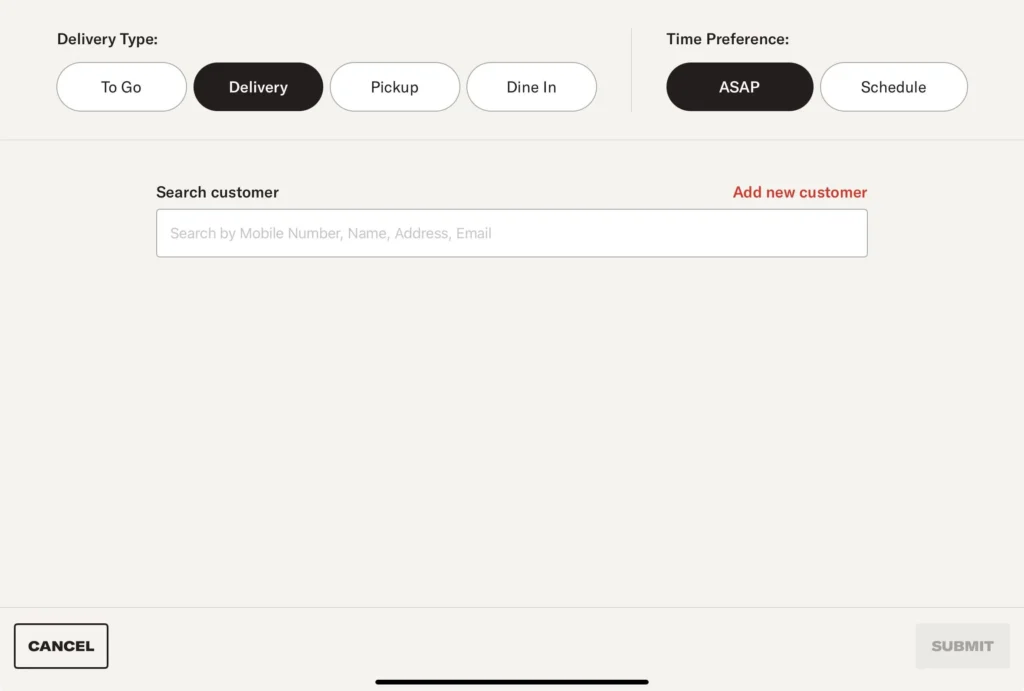
Tap Delivery. You will be brought to the Customer screen.
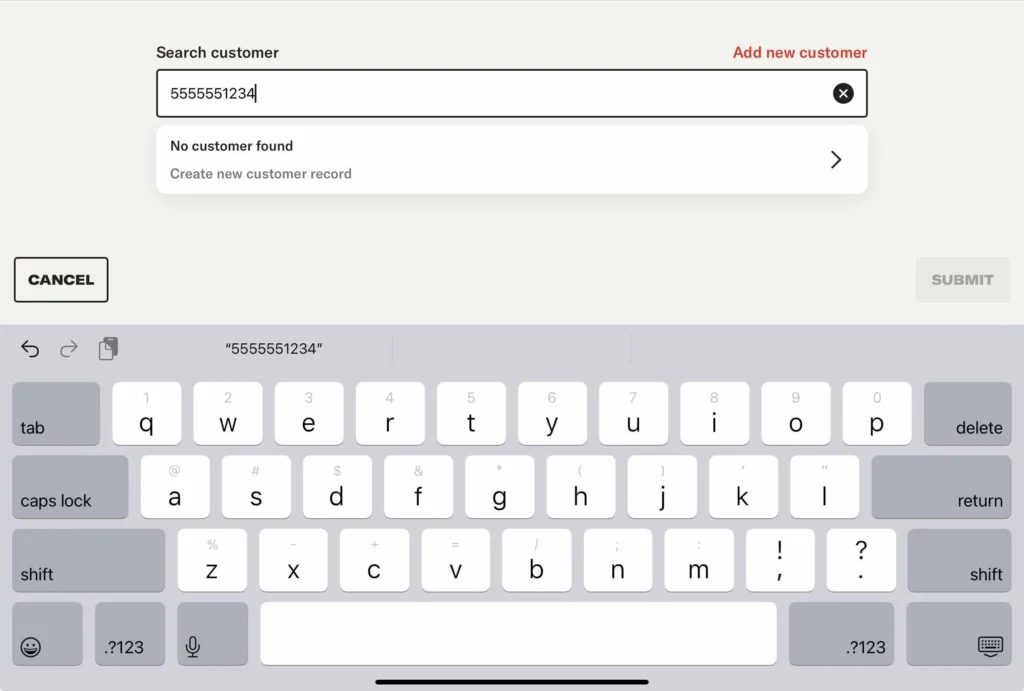
Search for the customer using their phone number. You can also search by name, address, or email, but phone number is the most unique identifier.
All Slice Online customers are already in the Slice database. You can import older POS customer lists in the Owner’s App (web).
If the customer does not have a profile, tap Add New Customer.
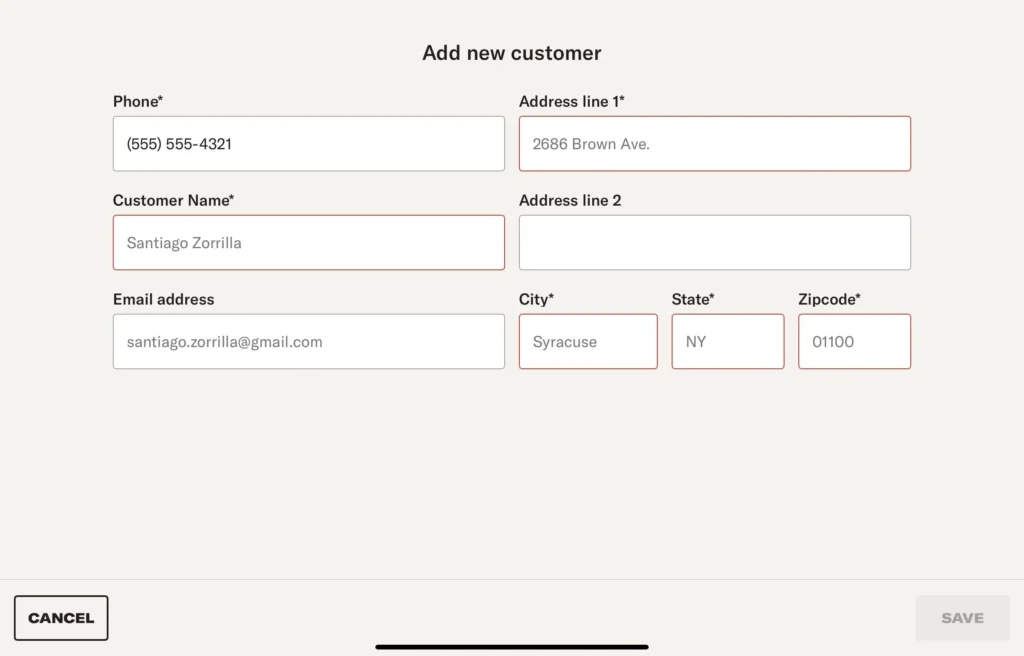
Delivery orders require an address.
Address Line 1 uses Google Maps to suggest nearby addresses for accuracy.
The system will auto-fill city, state, and ZIP code.
Tap Save, then
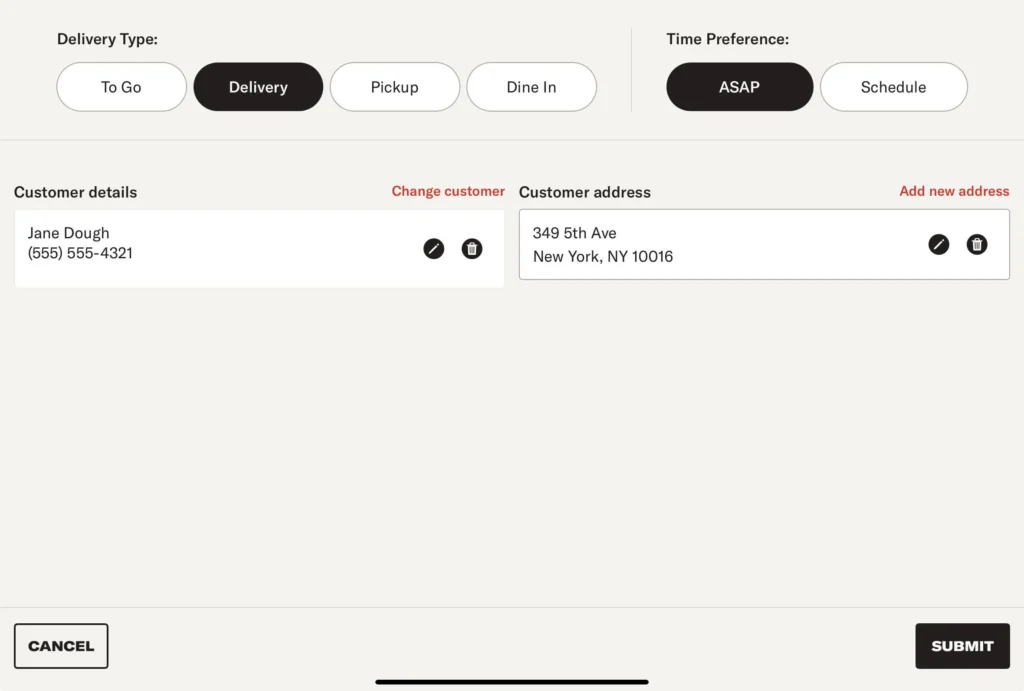
Tap Submit from the customer page.
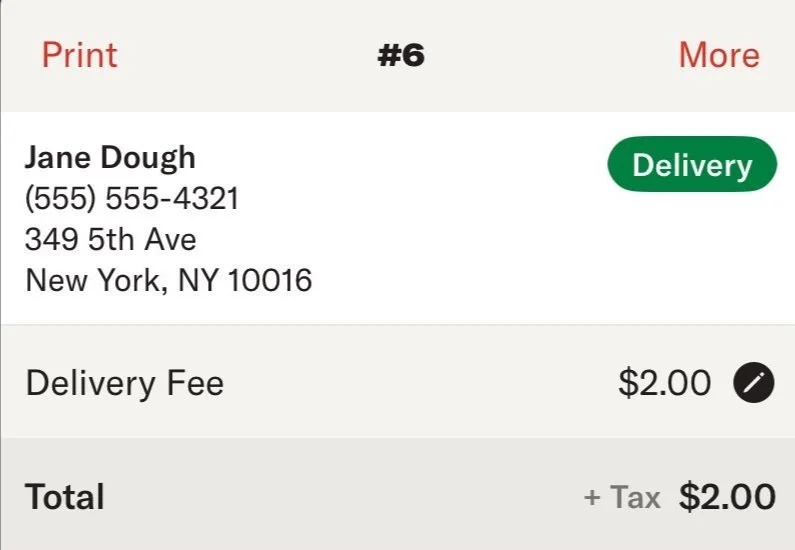
If you have delivery fees configured for Slice Online Ordering, they will be automatically applied based on the address.
If the address is outside your Slice Online delivery zone, you will be notified but allowed to proceed.
You can edit or add a customer delivery fee by tapping the pencil icon next to the fee amount.
After adding items, choose your payment method.
Credit Card: Payment must be made over the phone before sending the order. Select card and tap Hand Entry
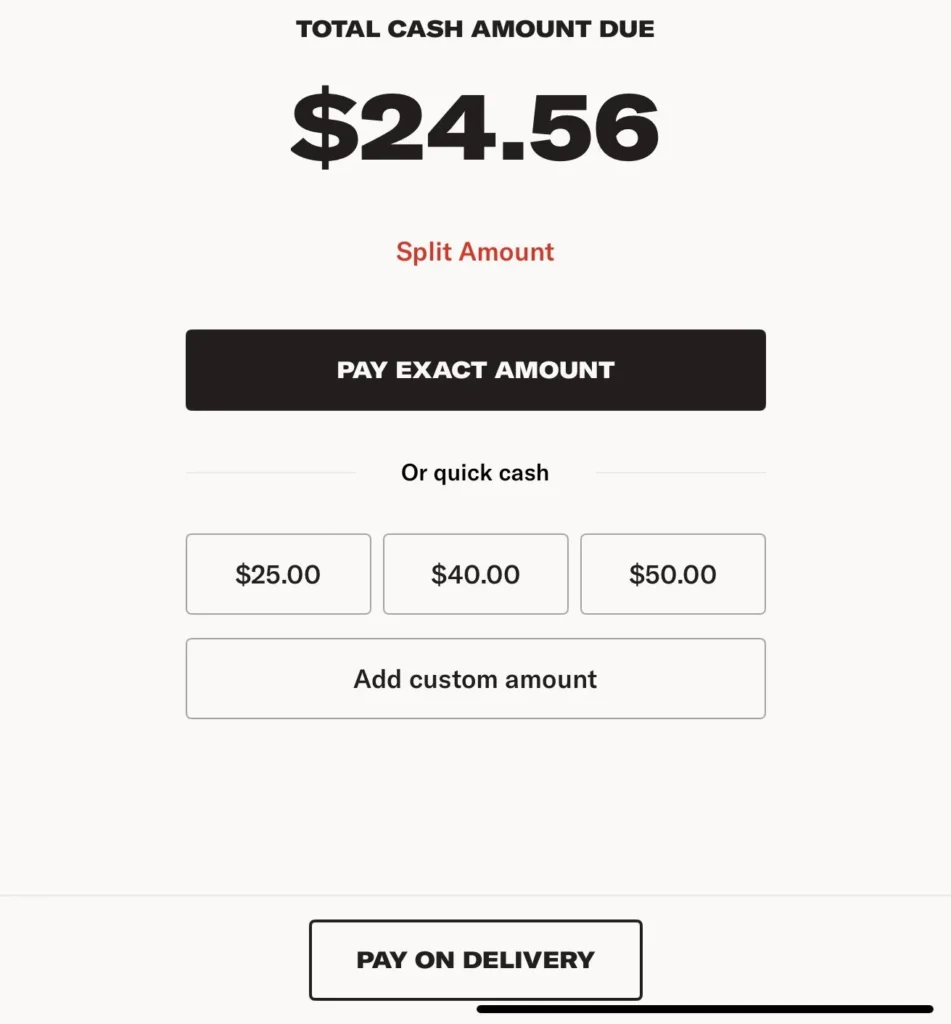
Cash: Select Pay on Delivery from the cash payment screen. The order will be moved to the Order Management – In Progress screen while it awaits the return of the driver with the cash. This can not be adjusted after the fact. If the Payment type needs to be changed, you will need to Copy this order and Clear the original.
To Go Orders
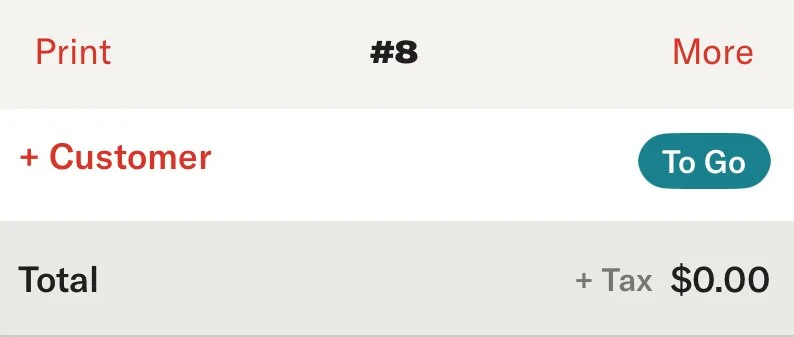
Tap To Go, or select an item before choosing a dining option.
The Register defaults to To Go orders for speed, so you do not need to select this dining option first.
These orders function the same as Dine In orders but let your team know the items should be packaged for takeout instead of being served on plates.
